This pesto recipe without pine nuts came out of pure necessity the first time I made it. I had fresh basil wilting on the counter, pasta already boiling, and then I realized I was completely out of pine nuts. Not a single one. And honestly, pine nuts are expensive, so even when I do have them, I hesitate to use a whole batch in one go.
Instead of scrapping dinner, I started testing alternatives, and that’s when I realized something important. Pine nuts are not the star of pesto, basil is. Once you understand that, everything changes. The right substitute gives you creaminess, body, and richness without overpowering the herbs.
This version is simple, flexible, and totally weeknight-friendly. It takes about 10 minutes, uses pantry staples, and tastes fresh, garlicky, and balanced. If you want pesto that feels classic but works with real-life kitchens, this one’s for you.
Why you’ll love this Pesto recipe without pine nuts
No pine nuts needed, budget-friendly and allergy-aware
Still rich, creamy, and flavorful
Comes together in minutes
Easy to customize with what you have
Freezes beautifully for meal prep
Works with pasta, sandwiches, and veggies
Tastes fresh, not oily or bitter
What I love most is how forgiving this pesto is. I’ve made it with walnuts, almonds, sunflower seeds, and even pumpkin seeds when that’s what was in the pantry. Every version worked as long as the balance was right. This is one of those recipes that makes you feel confident instead of stressed.
Tips for success
First, let’s talk nuts and seeds. Toasting them lightly makes a huge difference. I tested this recipe both ways, and raw nuts gave a flatter flavor, while toasted ones added warmth and depth. Just a few minutes in a dry pan until fragrant is enough.
Use fresh basil that smells sweet and peppery, not bitter. If it’s starting to brown or smells grassy, your pesto will taste off no matter what you do. I always wash and fully dry the basil before blending to avoid watery pesto.
Add the olive oil slowly. Dumping it all in at once can make the pesto greasy. A steady stream helps it emulsify and turn creamy instead of separated. If your pesto tastes sharp or harsh, it usually needs salt or fat, not more garlic. I learned this the hard way. Balance first, adjust second.
Nutrition and health notes
Pesto is naturally nutrient-dense because it’s made from whole ingredients. Basil provides antioxidants and vitamin K, while nuts or seeds contribute healthy fats and protein. According to Healthline, basil contains compounds that may help reduce inflammation and support overall health
Olive oil is a key component here, providing monounsaturated fats that support heart health when used in moderation. Cheese adds calcium and flavor, but you can reduce the amount if you’re watching sodium.
This pesto recipe without pine nuts is adaptable for different dietary needs. You can make it vegan by skipping cheese or using nutritional yeast, and it’s naturally gluten free.
As always, portion size matters. Pesto is rich, so a little goes a long way.
This pesto also works beautifully as a base for quick sauces. Just thin it with a little cream or broth, and you’ve got something totally new.
Storage and make ahead
Pesto stores really well if you do it right. Keep it in an airtight container in the fridge for up to 5 days. To prevent browning, press plastic wrap directly onto the surface or drizzle a thin layer of olive oil on top.
Freezing is one of my favorite tricks. Spoon pesto into ice cube trays, freeze, then transfer to a freezer bag. This way you can grab just what you need. Frozen pesto keeps well for up to 3 months.
To use, thaw in the fridge or stir directly into hot food. Avoid microwaving, as it can dull the fresh flavor.
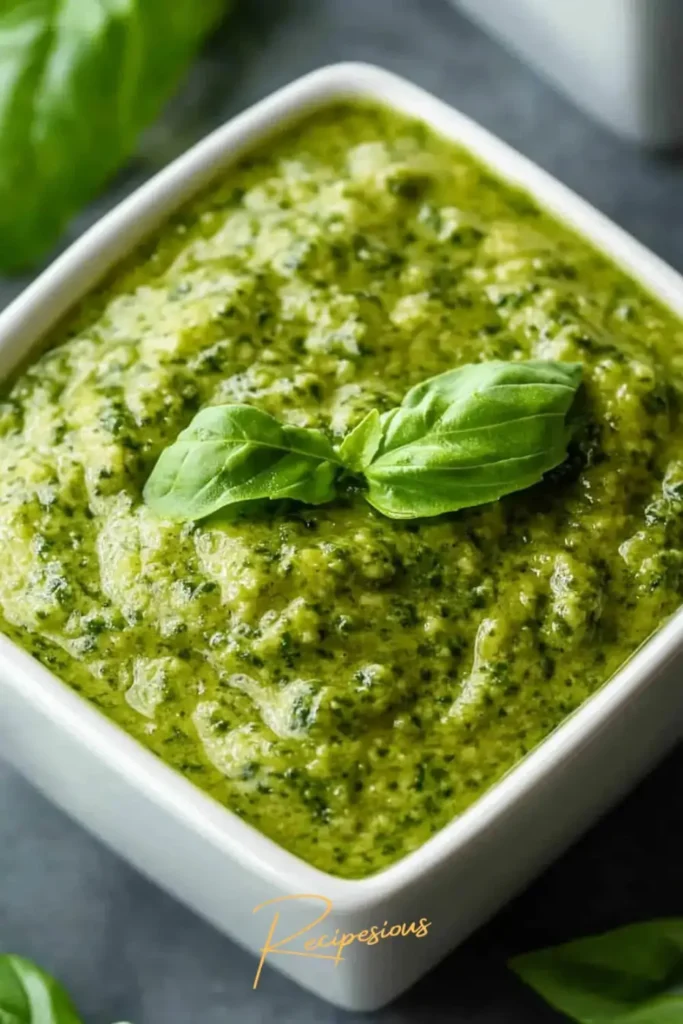
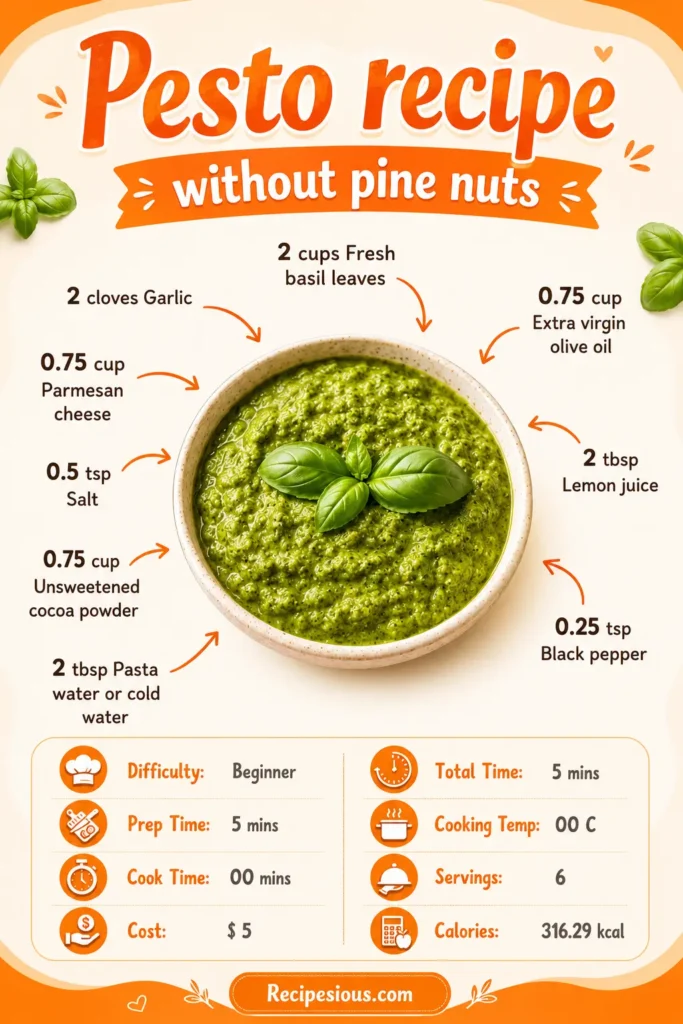
A vibrant basil pesto made without pine nuts, using simple ingredients like fresh basil, garlic, olive oil, and Parmesan, perfect for pasta or as a sauce, the classic pesto flavor without the expense or allergens of pine nuts.
2tbsp Pasta water or cold water (Optional, for loosening texture)
Instructions
1
Start with the basil and garlic
Add the basil and garlic to your food processor. I like to pulse a few times first to break everything down before adding liquids. This keeps the pesto bright instead of muddy.
2
Stream in the olive oil
With the processor running, slowly drizzle in the olive oil. Don’t rush this part. I stop once or twice to scrape down the sides so everything blends evenly. You want it smooth but still a little textured.
3
Add cheese and seasoning
Add the Parmesan, lemon juice, salt, and pepper. Pulse again just until combined. I learned the hard way not to over-blend once the cheese goes in, it can turn pasty fast.
4
Adjust the texture
If your pesto looks thick or stiff, add pasta water or cold water one tablespoon at a time. I usually need about 2 tablespoons to get that silky, spoonable consistency.
5
Taste and tweak
Always taste before calling it done. Need more salt, more lemon, or a splash more oil? Fix it now. Pesto should taste fresh, garlicky, and bold, not flat.
Nutrition Facts
Servings 6
Amount Per Serving
Calories316.29kcal
% Daily Value *
Total Fat31.71g49%
Cholesterol12.64mg5%
Sodium220.64mg10%
Potassium51.82mg2%
Total Carbohydrate1.56g1%
Dietary Fiber0.19g1%
Sugars0.18g
Protein7g15%
Vitamin A 59.63 mcg
Vitamin C 3.71 mg
Calcium 236.56 mg
Iron 0.59 mg
Vitamin D 0.09 mcg
Vitamin E 4 mg
Vitamin K 49.98 mcg
Vitamin B6 0.04 mg
Vitamin B12 0.22 mcg
Phosphorus 135.61 mg
Magnesium 14.1 mg
Zinc 0.59 mg
* Percent Daily Values are based on a 2,000 calorie diet. Your daily value may be higher or lower depending on your calorie needs.
Note
Why no pine nuts works: I tested this side by side with classic pesto, and the olive oil and Parmesan bring enough richness that you don’t miss the nuts at all.
Garlic too strong: If raw garlic feels harsh, sauté the cloves in a little olive oil for about 30 seconds before blending. It softens the bite without losing flavor.
Color matters: To keep the pesto bright green, avoid over-processing and store it with plastic wrap pressed directly on the surface.
Make it vegan: Skip the Parmesan and add 2 to 3 tablespoons of nutritional yeast plus extra salt to taste.
How I use it: Tossed with hot pasta, spread on sandwiches, spooned over grilled chicken or roasted veggies, or swirled into soups at the last minute.
Pin this recipe to share with your friends and followers.
Alex Richardson
Food and Lifestyle Blogger
Hi, I’m Alex - a full-time food blogger, proud Dad of two wonderful boys, and a New York husband with a taste for adventure! I’m here to whip up recipes, juggle family life, and explore the world, one delicious dish at a time (usually with a little help from my taste-testing team at home!).