This keebler cheesecake recipe came out of one of those moments when I wanted a real dessert, not a boxed shortcut, but also didn’t have the energy for anything fussy. I had cream cheese in the fridge, a couple of eggs on the counter, and a box of Keebler cookies staring at me from the pantry. That felt like a sign. So I got to work, testing ratios, bake times, and crust thickness until it felt just right.
What I learned quickly is that the crust matters just as much as the filling. Too thick and it overpowers the cheesecake. Too thin and it crumbles when you slice. I tested different cookie-to-butter ratios and even tried baking the crust versus leaving it raw.
This cheesecake is creamy, smooth, and lightly sweet with a crisp, buttery base. Total time is about 20 minutes of prep plus baking and chilling. Skill level is beginner friendly if you follow the steps. It’s perfect for home cooks, busy moms, holidays, or anytime you want a dependable dessert.
Why you’ll love this Keebler cheesecake recipe
- Smooth, creamy cheesecake texture
- Buttery cookie crust that slices clean
- Simple ingredients, no fancy tools
- Easy to customize with toppings
- Reliable bake without cracks
- Great make-ahead dessert
- Crowd pleasing classic flavor
What I love most is how forgiving this recipe is. Once you understand the texture cues, it’s hard to mess up. I’ve made it for family dinners and larger gatherings, and it always disappears fast.
Tips for success
Room temperature ingredients are non-negotiable. Cold cream cheese leads to lumps, no matter how much you mix. I tested one batch straight from the fridge and regretted it immediately. Let everything sit out for at least 30 minutes.
Don’t overmix once the eggs go in. Too much air causes cracks and a puffed center that collapses as it cools. Mix just until combined and smooth.
Bake low and slow. Cheesecake doesn’t like high heat. A moderate oven gives you a creamy center instead of a dry one.
You’ll know it’s done when the edges look set but the center still has a slight jiggle, kind of like set pudding. If the center looks fully firm in the oven, it’s overbaked.
Cooling matters. Let the cheesecake cool gradually at room temperature before chilling. Sudden temperature changes are a big reason cheesecakes crack.
Nutrition and health notes
Cheesecake is definitely a treat, and that’s okay. This keebler cheesecake recipe is rich because of the cream cheese, eggs, and butter, which provide fat and protein that help with satiety. According to USDA FoodData Central, cream cheese contains calcium and fat-soluble vitamins, while eggs contribute protein and essential nutrients
Because this dessert is dense, smaller slices are usually satisfying. Pairing it with fresh fruit can help balance the richness without changing the flavor too much.
Homemade cheesecake also gives you control over ingredient quality and portion size, which can be helpful for families.
For food safety, the FDA recommends refrigerating dairy-based desserts promptly and keeping them covered to prevent contamination
This is comfort food meant to be enjoyed mindfully, not restricted.
Serving ideas and pairings
- Serve plain with coffee or tea
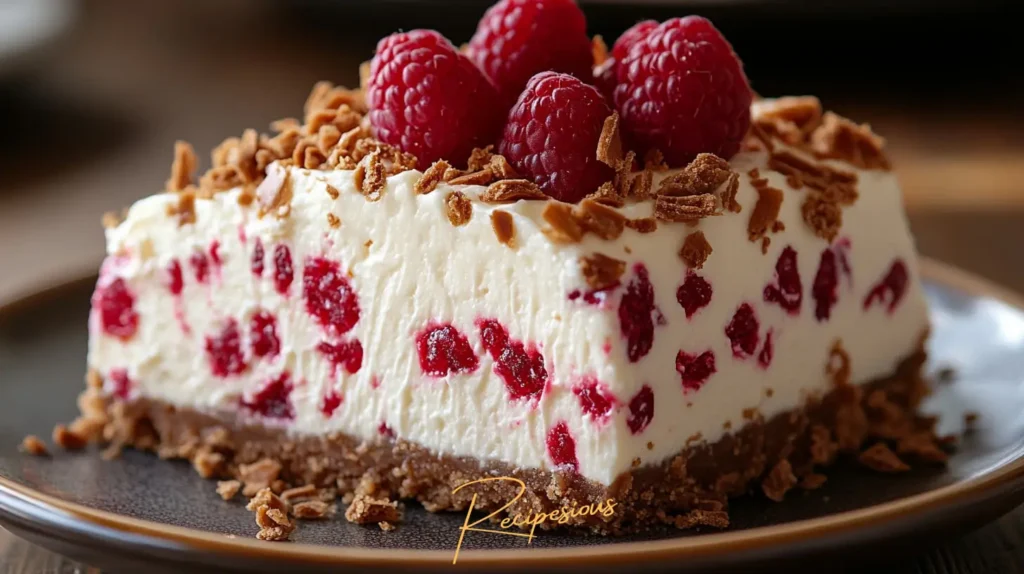
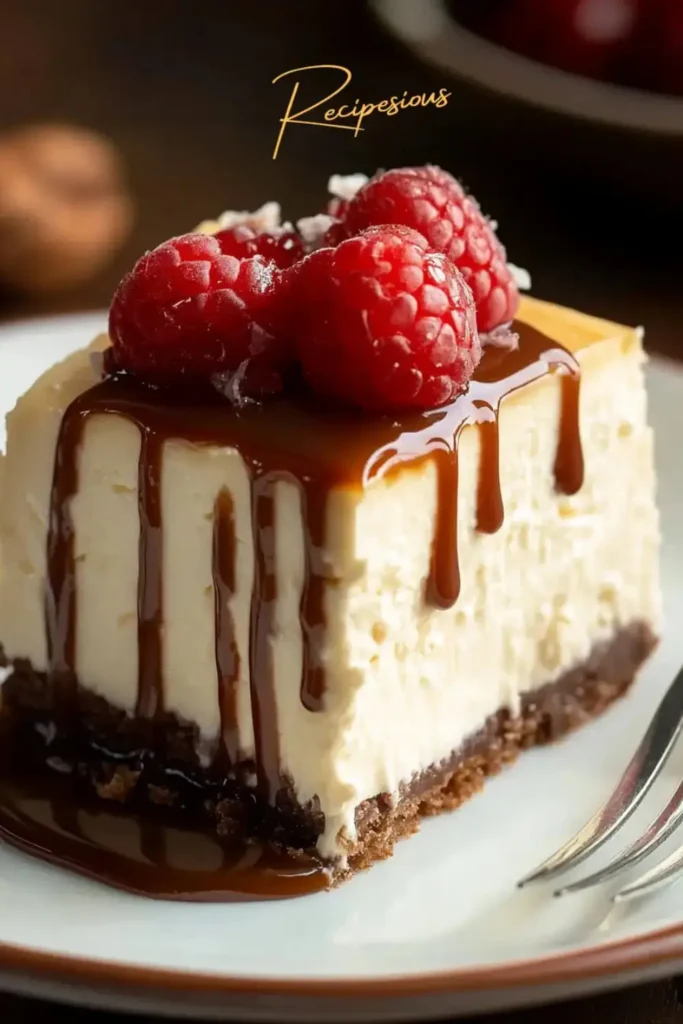
- Top with fresh berries
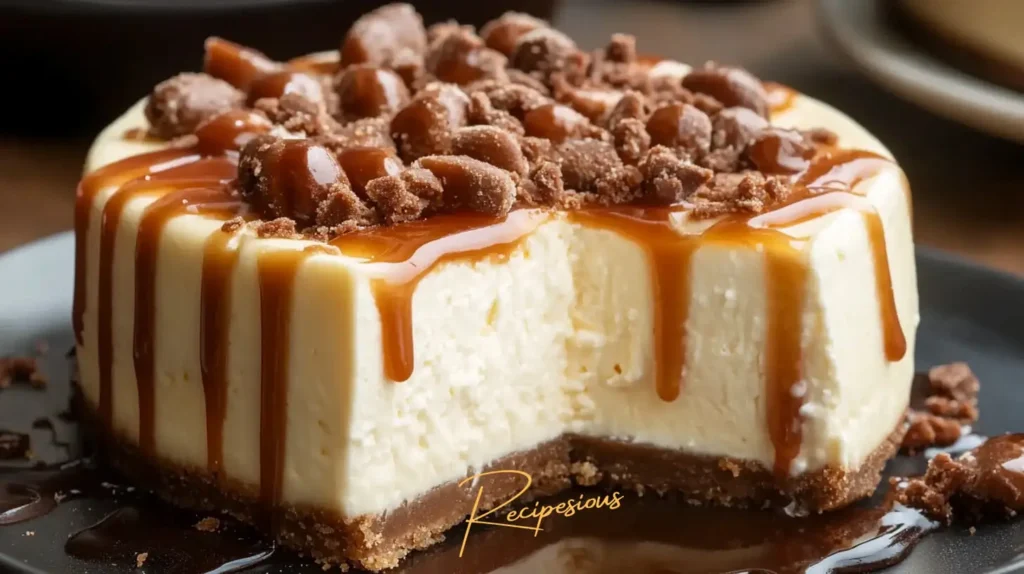
- Add a drizzle of chocolate or caramel
- Pair with sampaguita ice cream for a fun dessert duo
- Serve after savory meals like philly cheesesteak tortellini
- Add whipped cream for special occasions
- Serve chilled for clean slices
- Pair with fruit sauces or compote
This cheesecake also works well as a holiday dessert when you want something familiar but homemade.
Storage and make ahead
Cheesecake is a great make-ahead dessert. Once fully cooled, cover it tightly and refrigerate for up to 5 days. The flavor actually improves after the first day as it sets completely.
Freezing works too. Wrap individual slices or the whole cheesecake tightly in plastic wrap and foil. Freeze for up to 2 months. Thaw overnight in the refrigerator for best texture.
Avoid leaving cheesecake at room temperature for more than 2 hours, especially in warm kitchens. Always return leftovers to the fridge promptly.
Use a clean knife for slicing to keep the surface neat and fresh.
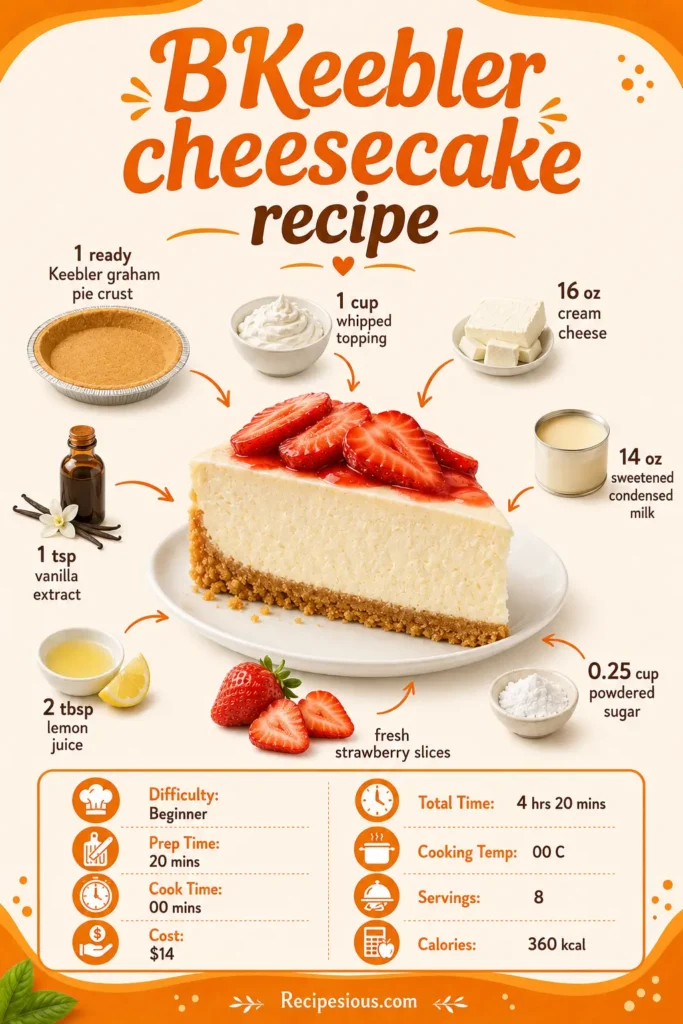
Keebler cheesecake recipe
Description
This Keebler cheesecake recipe is a classic baked cheesecake made with a buttery Keebler graham cracker crust and a rich, creamy cream cheese filling, perfect for an easy homemade dessert.
Ingredients
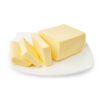
Graham Cracker Crust
Cheesecake Filling

Instructions
Prep the oven and pan
Preheat your oven to 160°C. Grease a 9-inch springform pan lightly. I always wrap the outside in foil just in case of leaks, even without a water bath.
Make the crust
In a bowl, mix the graham cracker crumbs, melted butter, and sugar until it looks like wet sand. Press it firmly into the bottom of the pan. I use the bottom of a measuring cup to really pack it down. Bake the crust for 10 minutes, then let it cool slightly.
Beat the filling gently
In a large bowl, beat the cream cheese until smooth, about 2 minutes. Scrape the bowl well, those lumps like to hide. Add the sugar and mix just until combined. Don’t overbeat here, too much air can cause cracks.
Add eggs and dairy
Add the eggs one at a time, mixing gently after each one. Stir in the sour cream, vanilla, and salt until smooth and creamy. The batter should look silky, not fluffy.
Bake low and slow
Pour the filling over the crust and smooth the top. Bake for 50 to 55 minutes. The edges should be set, but the center should still jiggle slightly when you gently shake the pan. That jiggle is your friend.
Cool properly
Turn off the oven and crack the door open. Let the cheesecake sit inside for about 1 hour. This slow cool helps prevent cracks. After that, move it to the counter to cool completely, then refrigerate for at least 3 hours before slicing.
Nutrition Facts
Servings 12
- Amount Per Serving
- Calories 405.75kcal
- % Daily Value *
- Total Fat 31.19g48%
- Cholesterol 128.49mg43%
- Sodium 262.11mg11%
- Potassium 126.11mg4%
- Total Carbohydrate 26.88g9%
- Dietary Fiber 0.14g1%
- Sugars 22.12g
- Protein 6.01g13%
- Vitamin A 261.09 mcg
- Vitamin C 0.17 mg
- Calcium 90.88 mg
- Iron 0.56 mg
- Vitamin D 0.25 mcg
- Vitamin E 1.03 mg
- Vitamin K 6.45 mcg
- Vitamin B6 0.06 mg
- Vitamin B12 0.28 mcg
- Phosphorus 117.62 mg
- Magnesium 9.85 mg
- Zinc 0.54 mg
* Percent Daily Values are based on a 2,000 calorie diet. Your daily value may be higher or lower depending on your calorie needs.

Note
- Room temperature matters: I tested this once with cold cream cheese and ended up chasing lumps forever.
- Cracks happen: If you get one, don’t panic. A little whipped cream or fruit topping hides everything.
- Too brown on top: Your oven may run hot. Next time lower the temp slightly or move the rack down.
- Clean slices: Dip your knife in hot water and wipe between cuts.
- Make ahead: This cheesecake tastes even better the next day once it’s fully chilled.
- Storage: Keep covered in the fridge for up to 5 days, or freeze slices for up to 2 months.